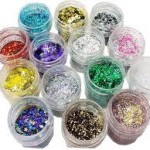

Glitter nails is all the rage at the moment and when the sun starts to show its pretty little face all your client will also want to sparkle like the sun.
Glitter acrylics are becoming more and more popular and glitter polymer pots can be expensive, especially when you need to buy one in every colour to suit all your clients styles. So here is a simple and easy way to save money and give your clients what they really want.
If you make your own glitter powders you have to be careful to get your ratio mix just right…….
- Mixing too little glitter in your powder can make the glitter seem drab or pointless and leave you thinking ‘why did I bother pre mixing and wasting my time and money?’
- Mixing too much glitter can cause the acrylic not to set properly and cause premature lifting, Which is also not a very good thing for your business.
By following these simple steps you can achieve perfect glitter acrylics always.
You will need:
- Your choice or acrylic powder.
- Your choice of glitter.
- Spare pot to mix glitter powder into.
- A spoon shaped (c curve) dual tool, or measuring spoons.
How to mix:
Step 1: Get your empty pot.
Step 2: Get your choice of powder. You can use a clear acrylic powder or a coloured powder of your choice. Just make sure when working with coloured powders/glitters you are choosing two colours that compliment each other well.
Step 3: You ratio mixture is 3 parts powder, 1 part glitter. So therefore every scoop of glitter you place in you need 3 scoops of powder.
Step 4: Start by adding 3 scoops or acrylic powder (you can always mix more if you need to).
Step 5: Add 1 scoop of your choice of glitter. If you need to add more due to having mixed more powder do so accordingly.
Step 6: Screw lid on powder and shake thoroughly, Making sure all the powder and glitter is fully mixed.
Step 7: Away you go…………
